以前只是用过别人托管在Jitpack上的库,自己的库都是托管在MavenCentral上,但是MavenCentral使用起来,相比Jitpack还是有些麻烦。经过简单尝试和学习,了解了Jitpack的使用,做一下简单记录。
我第一个托管在Jitpack上的库——J2V8Helper
Step 1: 在library module中使用maven-publish插件
在库目录下的build.gradle文件中,应用maven-publish插件,修改后的build.gradle文件入下:
plugins {
    id 'com.android.library'
    id 'org.jetbrains.kotlin.android'
    id 'maven-publish'
}
// Other code
然后检查此插件是否引入成功,在AndroidStudio的右侧,Gradle面板中,library module下查看有无publishing的任务组。
如果找不到,有可能是AndroidStudio配置的问题,在AndroidStudio的设置中,进入Experimental选项卡中,找到Gradle分组,找到
Only include test tasks in the Gradle task list generated during Gradle Sync,如果勾选了,请不要勾选此选项。
在library module下的build.gradle结尾,添加如下代码:
afterEvaluate {
    publishing {
        publications {
            // Creates a Maven publication called "release".
            release(MavenPublication) {
                // Applies the component for the release build variant.
                from components.release

                // You can then customize attributes of the publication as shown below.
                groupId = 'com.github.xyz'
                artifactId = 'abc'
                version = '0.0.1'
            }
            // Creates a Maven publication called “debug”.
            debug(MavenPublication) {
                // Applies the component for the debug build variant.
                from components.debug

                groupId = 'com.github.xyz'
                artifactId = 'abc'
                version = '0.0.1'
            }
        }
    }
}
需要注意的是,此配置,在Jitpack的编译中,并不会生效,Jitpack中你的库的引用,永远都是
com.github.{你github用户名}:{此项目在gitHub上repository的名字}:{创建release的tag名字}。此处配置,只为检查你的maven-publish是否生效。
然后执行Gradle任务中的publishReleasePublicationToMavenLocal,待执行完毕,查看$HOME/.m2/responsitory路径下,有无你的库存在。如果成功,请执行下一步骤。
Step 2: 将代码push到github并新建release
在你Github对于的repository下,新建一个tag和release。
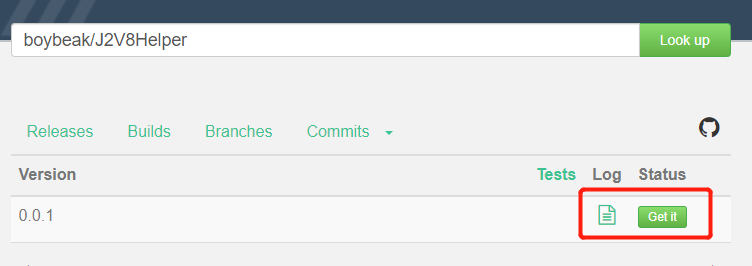
Step 3: 在jitpack.io搜索你的库,并执行打包

点击Get it,然后等待编译结束,如果编译失败,会有日志记录,可以查看对应的日志来处理。
需要注意的是,Jitpack默认的java版本为java8,如果你的Gradle版本比较高的话,比如我项目的Gradle版本为7.4.0,需要修改java版本,在项目的根目录下,创建一个jitpack.yml文件,增加配置脚本如下:
jdk:
  - openjdk11
Gradle版本7.4.0对应最低编译版本为java11,则我修改为openjdk11。
参考文章
| **[使用 Maven Publish 插件]([使用 Maven Publish 插件 | Android 开发者 | Android Developers](https://developer.android.com/studio/build/maven-publish-plugin?hl=zh-cn))** |
 Banner Dog
 AOD Volume
 JustTodo
 DeskNote
 Translator